
Running OpenVPN instance in the LXC container under Proxmox is quite easy. The OpenVPN can be used to connect LAN networks, access the resources (even behind the NAT) or can be used for forwarding whole traffic via OpenVPN server.
In this article you will find information how to set up the OpenVPN server on Debian 10 (Buster), how to forward the ports or how to use OpenVPN behind HAProxy load balancer.
Setup a new CT
Create a new CT like in the screenshots below.
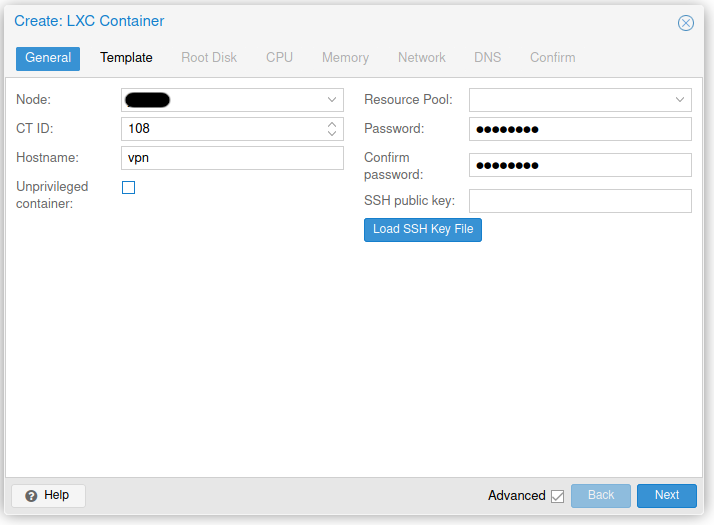


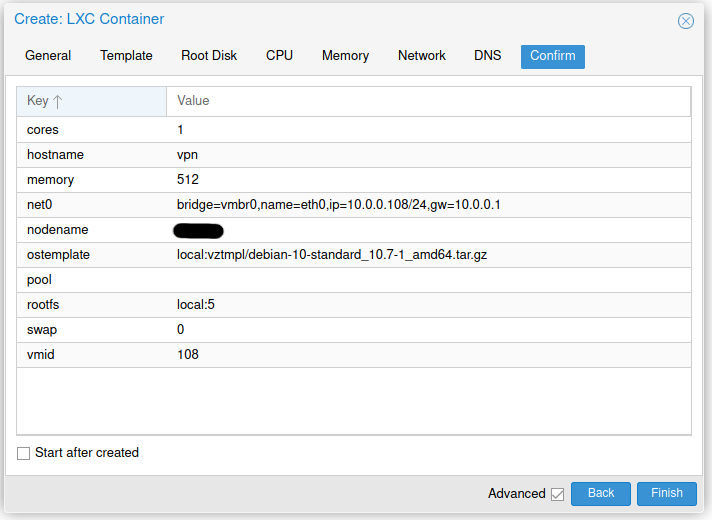
Or use the command:
pct create 100 local:vztmpl/debian-10-standard_10.7-1_amd64.tar.gz --hostname vpn.foo.bar --net0 name=eth0,bridge=vmbr0,ip=10.0.0.100/24,gw=10.0.0.1,type=veth --storage local
Access to tun device
Open the container configuration file stored in /etc/pve/lxc/100.conf with your favourite editor add add following lines:
lxc.cgroup.devices.allow: c 10:200 rwm
lxc.hook.autodev: sh -c "modprobe tun; cd ${LXC_ROOTFS_MOUNT}/dev; mkdir net; mknod net/tun c 10 200; chmod 0666 net/tun"
Installing
To install the OpenVPN server please refer to the following command:
apt install openvpn easy-rsa
Port forwarding
Add the following lines into /etc/network/interfaces in the vmbr0 interface definition:
post-up   iptables -t nat -A PREROUTING -i eth0 -p tcp --dport 1194 -j DNAT --to 10.0.0.100:1194
post-down iptables -t nat -D PREROUTING -i eth0 -p tcp --dport 1194 -j DNAT --to 10.0.0.100:1194
/etc/init.d/networking reload
Generating keys for the OpenVPN server
Go to /etc/openvpn and execute the following commands to generate the keys needed to start up the encrypted VPN tunnel.
cd /etc/openvpn
make-cadir ca
Then open the ca/vars file and fill the variables export KEY_COUNTRY, KEY_PROVINCE, KEY_CITY, KEY_ORG, KEY_EMAIL with your data, save the file and continue preparing the keys:
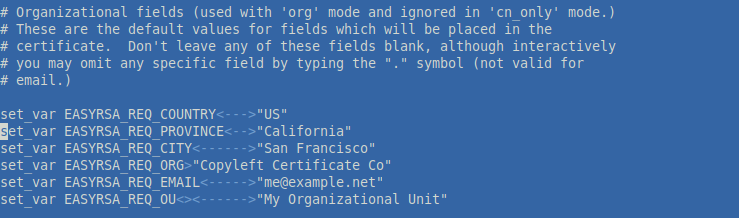
Also you can uncomment EASYRSA_CA_EXPIRE and EASYRSA_CERT_EXPIRE. The second one is used for generating the keys for clients and can be increased to 3650 days (about 10 years).
cd ca
ln -s openssl-1.0.0.cnf openssl.cnf
./easyrsa init-pki
./easyrsa build-ca nopass
./easyrsa build-server-full server nopass
./easyrsa gen-dh
The keyword nopass is optionally and can be skipped in the commands above.
OpenVPN server configuration file
server 10.1.0.0 255.255.255.0
port 1194
proto tcp
dev tun
tun-mtu 1500

verb 3
user nobody
group nogroup
persist-key
persist-tun

client-to-client
keepalive 10 120

# Certs, configs, logs
client-config-dir /etc/openvpn/ccd

ca /etc/openvpn/ca/pki/ca.crt
cert /etc/openvpn/ca/pki/issued/server.crt
key /etc/openvpn/ca/pki/private/server.key
dh /etc/openvpn/ca/pki/dh.pem

ifconfig-pool-persist /var/run/openvpn/ipp.txt
status /var/run/openvpn/server.log

# Routing
push "route 10.1.0.0 255.255.255.0"
If you want to forward whole traffic throw your server (for all clients), please add the lines below into the server configuration file:
push "dhcp-option DNS 8.8.8.8"
push "dhcp-option DNS 8.8.4.4"
push "redirect-gateway def1 bypass-dhcp"

script-security 3
up "/etc/openvpn/iptables.sh 1"
down "/etc/openvpn/iptables.sh 0"
And create /etc/openvpn/iptables.sh file (with executable permission) with contents:
#!/bin/bash

IP=$(ip -4 addr show eth0 | grep inet | awk '{print $2}' | cut -d'/' -f1)

if [ $1 -eq 1 ]
then
    echo 1 > /proc/sys/net/ipv4/ip_forward
    /sbin/iptables -t nat -A POSTROUTING -o eth0 -j SNAT --to-source $IP
else
    /sbin/iptables -t nat -D POSTROUTING -o eth0 -j SNAT --to-source $IP
fi
Generating keys for clients
To generate the keys for clients please use the command:
./easyrsa build-client-full clientname nopass
Also in this case the keyword nopass is optionally and can be skipped.
Now generate the file configuration file for client. First create the client template file, lets save it as /etc/openvpn/client.tmpl:
client
dev tun
proto tcp
remote 1.2.3.4 1194 # or foobar.com 1194
remote-random
nobind
persist-key
persist-tun
remote-cert-tls server
verb 3
auth-nocache
tun-mtu 1500
mssfix

################################################################################
# DO NOT MODIFY BELOW!
################################################################################
And run these commands to generate a single file with whole configuration and needed certificates:
cat /etc/openvpn/client.tmpl > client.ovpn
echo "<ca>" >> client.ovpn
sed -n '/BEGIN CERTIFICATE/,/END CERTIFICATE/p' < /etc/openvpn/ca/pki/ca.crt >> client.ovpn
echo "</ca>" >> client.ovpn
echo "<cert>" >> client.ovpn
sed -n '/BEGIN CERTIFICATE/,/END CERTIFICATE/p' < /etc/openvpn/ca/pki/issued/client.crt >> client.ovpn
echo "</cert>" >> client.ovpn
echo "<key" >> client.ovpn
sed -n '/BEGIN PRIVATE KEY/,/END PRIVATE KEY/p' < /etc/openvpn/ca/pki/private/client.key >> client.ovpn
echo "</key>" >> client.ovpn
Static IP address in the VPN network
To assing the static IP address for the OpenVPN client, create a file /etc/openvpn/ccd/client and put the line:
ifconfig-push "10.1.0.10 10.1.0.9"
Troubleshooting
OpenVPN client cannot connect with static IP address
In this case in the logs you can find the information that assigned IP address doesn’t belong to the network with the mask 255.255.255.252 (/30). To fix the problem, open your client configuration file in /etc/openvpn/ccd and change the static IP address which belongs to /30 network. You can use the table with listed networks with /30 mask from here.
OpenVPN is assigning the IP address from other client with static IP
This situation may be occured when there is a not connected client with the static IP with the lower address, for example 10.1.0.8. To fix the problem open your client configuration file in /etc/openvpn/ccd and change the static IP address to a higher one, for example 10.1.0.200. This will prevent giving the static IP address to other client when the client with static IP address is not connected.
Sources
- https://wiki.debian.org/OpenVPN
- https://www.aelius.com/njh/subnet_sheet.html